Showing posts with label recipe. Show all posts

Friday, 3 October 2014

S is for Soup

I love soup.

It's giving like giving your body a hug from the inside out.  

It's seasonal cooking at its best and is great at turning the odd parsnip, half a swede and few potatoes into a feast. 

I am even feeling happier just writing these first few sentences.

It is the perfect accompaniment to a blustery autumn day, and autumn has definitely started to make it's presence known. The days may still be warm but the mornings are chilly and the evenings are cold enough that it warranted a few minutes conversation with our cat on the back door step last night about whether he really wanted to stay outside, or come back in and snuggle up on the foot of our bed.

But I digress.

Soup is delicious, nutritious, and comes in so many flavours and guises.

Clear broth or thick and creamy. Chunky vegetable or smooth. With or without croutons (silly question that)

And it can be a super quick meal if you have some in a can...so it gets bonus points for that.

In fact, one of my most favourite soups is the legendary "Cream of Tomato" by Heinz, but since shopping at Lidl we have tried their version of it and guess what? You can barely tell the difference; pretty much the same taste and definitely the same orange/red colour. 

Now this particular flavour of canned soup has been a favourite since I was very very small and has stayed with me to this day. However when I was a teenager one of my friends revolutionised this soup for me and it changed me for life...although I don't think I ever told her this...I would like to share this story with you. 

As the story goes we were in our mid teens, and I cant remember if it was a weekend or holiday or if we were on study leave but we were at said friends house and got a bit peckish as teenagers do so set about making lunch. A can of soup was opened and put on the stove, bowls were taken out of the cupboard but then my friend opened the fridge and pulled out some cheese.   Needless to say I was baffled as I watched said friend cut up the cheese into tiny chunks and put them at the bottom of each bowl and then pour the hot soup (tomato...obviously) over the cheese.

I was astounded...as I ate my soup I would get the occasional mouthful of molten cheese and it was amazing and as long as I don't have a cheese sandwich to dip in my tomato soup (more on that in a moment) I always put cheese in my tomato soup now. So Hannah, if you are reading (*waves*) thank you very much for introducing cheese in tomato soup for me 

But what about soup not from a can? 

Thankfully my tastes and ability in the kitchen have come a long way since I was a teenager. I cannot resist a properly topped off French onion soup and a chicken noodle soup is the best medicine when you have the flu.

I am lucky that my boys are not fussy eaters and home made vegetable soup is a big hit in my house with the Two Monkeys as long as there is bread or a cheese sandwich to dip in it.  I often have those half baked baguettes in the cupboard or freezer and after 10 minutes in the oven they are ready to go and having smothered them in butter they are a great side to most soups. 

Just remember that anything goes when it comes to soup...made with fresh ingredients or left overs, it really doesn't matter.

I have had a few recent hits in the kitchen with some of my soups so wanted to share them with you - one is a time saver and the other a left over user upper.

So the time saver soup was made on a Sunday, as usual the boys were up at 6am (ish) and we go to church as a family at about 10.30am.  This does mean that I have a lot of time to get things done before we go but am often rushed to get lunch for my very hungry boys on our return. This particular sunday I knew I had a heap of root vegetables that needed using and a spare half hour in which to make something before we left the house. I got out my trusty cast iron pan (which also happens to be our most enduring wedding present) and fried up a large sliced onion, added in very roughly chopped carrots, white potatoes, sweet potatoes and two squashed garlic cloves. I maybe sautéed them for about two minutes before covering with freshly boiled water so everything was just covered. Add in a stock cube and put the lid on. I then put the whole thing in the oven at 120 and set the oven to turn off after 90 minutes. We returned home from church and the kitchen smelt lovely and all that was left for me to do was use our stick blender to purree the contents of the pan along with some fresh herbs from the garden and fry up some bacon to go on top. Now this last bit makes any soup a winner with my dear husband  as a meal isn't a meal unless it has meat so I always keep streaky bacon in the fridge just for this purpose...plus it adds some saltiness to the soup too.

Now of course this time saver can be made with all sorts of other vegetables and could be left in the oven once cooked for any amount of time until you are ready to eat it.

My left over user upper soup happened as quite a mistake...but a happy one.

I had made a lovely dish of sag aloo (that's an Indian dish made with potatoes, onions and spinach with spices) to go with a curry over the weekend and 5 days later I still had a large portion left in the fridge. Rather than relinquishing it to the food bin, I boiled up some carrots (yes they are a staple base of many of my soups) and blended them along with the potato dish.

The result was a lovely green curried soup which went brilliantly with a few sunflower seeds sprinkled on top...the Two Monkeys devoured it. Well OK, they both ate most of it but my Little Giant did end up with a good helping of it over his face and hands but nothing a quick wipe down couldn't solve. I was so surprised at how much I enjoyed it too that this will definitely feature again on our menu.

So with the weather supposedly on the turn this weekend for something a bit more wet and windy, why not find out a new soup recipe to try. I have already spotted a fabulous crab and noodle soup over at The Pie Patch today which I am looking forward to sampling.

Friday, 19 September 2014

R is for Rusks

Some of you will now be in a very happy place thinking about rusks. In fact, I suggest that before you read any further you make a hot milky beverage of your choice to enjoy with a rusk while you read.

The rest of my readership will fall into the category of uninitiated in the way of the rusk and are probably thinking "why is she writing about baby teething biscuits that do nothing but cause a mess and turn to musk" right now.

Well, prepared to be enlightened.

Rusks are the anglicised term for beskuit a traditional biscuit in South Africa that you have for breakfast, they are designed for dunking...nay... soaking in your morning tea or coffee.  You definitely cannot eat them dry or you are likely to break a tooth and that will really spoil your day. Of course you don't just have to keep them for breakfast either, they are great as a snack with a hot drink any time of the day,

So why am I eating rusks? Well, here comes a bit of background for those that don't know me so well.. my dear husband is from South Africa I have been enjoying rusks for a good 6 years now, and whilst you can buy the big brand Ouma Rusks over here in the UK they are massively marked up so they became a bit of a treat that we would always bring some back after a trip or visiting family would cram packs into their suitcases.

But then I realised that actually, maybe it was time it was only after our visit in December 2013 that I decided to step out, be brave, and make my own.  And you may not think it, but it is a big deal as the rusks that we buy when in South Africa aren't a mass produced product but something that a ladies bake up at home and sell at the local corner shops to supplement their income and they are faultless...and delicious...and when they hold such a central place in your families heart, trying to replicate them is quite a daunting task.


But what is a rusk in baking terms? Essentially they are is a bread based dough that is baked twice so in a way very similar to biscotti.  Some recipes call for yeast, some don't. It really is totally dependant on the type of rusk you are after. Once you make and prove the dough you separate it into balls, pack it into a tin and bake. Once baked you tear the pieces apart and put them back into the oven at a very low temperature to dry out (preferably overnight)

So I returned home with a few cut out recipes from magazines as well as looking up a few online recipes to see what they had to say and then every Sunday for about 4 weeks, I made rusks.


Now some batches were much more successful than others, the one I tried to make with yeast was alright but possibly in trying to be clever and cook it in my large square stone baker it didn;t quite work. I should have rather used several smaller loaf tins so the dough in the middle wasn't undercooked...if they were judged on Great British Bake Off they would definitely get the Paul Hollywood prod of disaprovement.  I also used 100% whole wheat flour in an attempt to make it healthier but that also didn't quite work. In subsequent batches I still used it but only as 30 or 40 % to plain white flour.


I then moved on to the more breakfast type rusks, the ones where one or two will set you up for the morning but a third would just be too much. With these I really could go to town on what when in; seeds, ground nuts (like almond and coconut which in turn reduced the wheat content), museli. They were also a simpler bake as there was no proving to do it was very much a case of mix the wet and dry ingredients together and bake. These proved to be much closer to the ones that we bought when in South Africa and are still my favorite ones to make, the recipe was from another blog called Under the Blue Gum Tree and I highly recommend following the link if you want to try it.


 Due to our moving house in March I started packing up the kitchen in late February so my weekly stashes of rusks came to an end.  I also have to admit to getting a little frustrated with my Little Giant as he had just started walking and had a tendency to like turning the oven temperature knob....so two batches instead of "drying" actually got baked to a crisp and burnt raisins are really not nice.  Thankfully the oven in our new kitchen is higher and I also have a baby gate to keep the Two Monkeys out while I am cooking so I really have no excuses not to start making them again.

So put away your Rich Teas (or Marie Biscuits), hide the Hobnobs and ditch the Digestives, when it comes to dunking biscuits in your tea or coffee...you need rusks in your life.  I know that writing today's post has made me quite hungry for some so I am making sure the ingredients have gone down on my shopping list for this weekend!

Friday, 5 September 2014

P is for Pampered Chef

Pampered Chef...what is it? 

Let me be very clear, it isn't me standing in the kitchen with a face mask on whilst I cook.

It is a lovely range of kitchen ware and gadgetry that can make cooking and baking and doing what you do in the kitchen much easier. If not a lot more fun.

I first discovered the pampered chef products about 4 years ago whilst still pregnant with The Bug. My sister had become a Pampered Chef consultant and I dutifully hosted a party at our wimbledon flat, describing it to my friends as like an Anne Summers party but with stuff for the kitchen and a bit cooking to see how things work.  This was the first of 4 parties that I would end up hosting and I enjoyed every one of them.  In fact, by the last party my sister didn't even have to bring any of her demo kit as I had about a third of the catalogue in my kitchen cupboards already. 


Admittedly I didn't have to buy EVERYTHING that I had, some I got free as a bonus for the amount spent at my party and some bought with the points I earned from hosting the party or bought with the host discount.

Out of the various bits and pieces I have, I do havea few favourites and have listed them (complete with links to The Pampered Chef website) so you can pop over and have a nosey.

  • My stoneware, in particular the pizza stone and medium bar pan get used pretty much every day. And for all sorts, I can cook meat on there then do some pizza or chips and then fish and there is absolutely no residual smell. They are amazing and naturally non stick so you don't have to cook with much oil, for example, the muffin pan I also turns out the most perfect and tall yorkshire puddings with only a brush of oil under the batter. I have five stoneware pieces, the three I have already mentioned along with the square baker and the large rectangular baker. In the states they also do a stone bunt tin which looks fantastic but they don't have that over here yet.
  • The food chopper. I don't have time to finely dice ingredients for some recipies, and others i just want to cram as much veg in without The Two Monkeys paying much heed. The chopper is a great way of chopping up veg quickly and into really fine pieces...and its child safe too. The bug loves having a go with it.
  • The knives. My dear husband got a large Santoku knife for Christmas about 3 years ago and he loves it. I don't use it as it is rather large for me but I do have the utility knife which I wield every day. It is so comfortable and comes with a life time guarantee but the quality is so good that I doubt we ever will have to use it.
  • The large scoop. When it comes to baking cupcakes or muffins or individual cakes, there is nothing like the scoop to ensure that the batter makes it into the case without making a mess AND the final cakes are identically sized
  • Prep pots. I have a set of 6 little glass prep pots that all come with plastic lids. They can be frozen, they can be heated (without the lids) and are just the bees knees for storing left overs for The Two Monkeys. 
  • The brownie pan. Now I don't know about you, but to me when you make (and eat) brownies or banana bread the corners are the best bit. This little piece of magical bake ware means that you can  have 4 corners all to yourself with every piece you make. Also, the cooking time for your brownie is shorter as its in smaller portions...so you get to eat it faster. Win/Win situation all round really.
There are lots more products that I could rave about (the garlic crusher is just brilliant) but I thought I would stick to the ones that have proven them selves most useful and do get used everyday.

I have to admit there are a few items and gizmos that have barely been touched but mostly because I got them as a gift or because I bought them in order to use up the points...the egg slicer springs to mind, but I am thinking of reviving it for the boys to use with playdough. 

However, the biggest white elephant has to have been the trifle bowl. It was a free gift for achieving so many sales at one of the parties I had  but it sat unopened and unused for 2 years after I got it...in fact I first used it one weekend not so long ago after our move. It also happened to be the first trifle I had ever made but that is mostly because it has never been my favourite dessert. However, this particular weekend was fathers day and I had promised my dear husband that I would make him a trifle (with extra love mixed in) and not only did it look great in the stunning bowl that FINALLY got used but it tasted wonderful too.  Now since that weekend it has only been used a further two times BUT it is getting out of its box more frequently and I have no doubt it will put in a regular appearance during the Christmas season when we will have a full house of family visiting from South Africa.

I also have to add that along with such fabulous products The Pampered Chef team also produce some fantastic recipes to go with them.  One of our favourites  is the Mexican Chicken 'Lasagne' that we make in our square baker (more stoneware), it's a  total genius recipe that is always great to do when we have guests but can also be made mild enough for the little ones to eat too.

And that about wraps it up for this post.

The only thing I have left to say is that I was not paid for this post or given any products for it and I am not a sales consultant for Pampered Chef. This post is totally my own opinion of the products and I totally agree that what may work for me might not work for someone else.  If you want to find out more about The Pampered Chef you can find them on twitter and facebook or if you want to have your very own cooking show go and take a peek at this page to find your local consultant. 

Friday, 15 August 2014

M is for Macaroni Cheese

Now before the giant marrow invaded my kitchen and my blog, I had fully intended on writing about the wonderful comfort food that is macaroni cheese.

Now I am not talking about the stuff out of a can...that I find a bit sickly.

Nor am I talking about the rather orange (but still quite yummy) Kraft Dinner, although if you have never ventured across the Atlantic pond you are unlikely to have ever sampled this delicacy.

I am talking about the home-made kind.

The kind that as a grown-up, it transports me back to my childhood and gives me that warm fuzzy feeling. It comes second only to sausages, smiley face potatoes and spaghetti hoops in evoking such memories

The kind where the sauce is made with a mix of whatever cheeses are lurking in your fridge...the more the better in my opinion.

And The Two Monkeys love it, and whilst it may not be the best meal in terms of nutritional value it tastes good and in moderation...why not? Getting to cook it is always great as it means I get to taste it (obviously) which in turn helps me not scoff the whole lot before anyone gets a look in.  In fact my oldest friend loves this dish and is always delighted if there is any left in the pot once the boys have eaten.

Now I realise that everyone has their own recipe, but for me put the pasta (it doesn't HAVE to be macaroni either) into boiling water and whilst it cooks make up a basic white sauce of butter, flour and milk. I won't give you the weights as I don't measure it out...it's more a chuck it in and see method. Add to that the cheese or cheeses of your choice, a bit of salt, pepper and a pinch of ground nutmeg and....voilà, you have the perfect dinner for a rainy day. 

Well, at least I think so.


M is for Marrow

And this isn't just any old marrow, this is a whopper of vegetable that was gifted to me by my Mother who got it from who knows where. Unfortunately "Olivia and the Giant Marrow" doesn't quite have the same ring to it as "James and the Giant Peach" but there is still a story to tell none-the-less

My problem was, I hadn't a clue what to do with it. Now I don't mean in terms of I didn't know how to cook a marrow as I have vague memories of having baked marrow stuffed with spicy rice as a child and could probably replicate that to one degree or another. But at the same time the same memories also tell me that stuffed marrow gave me really bad gas and that is not at all attractive so that option was quickly crossed off the list.

So whilst I could have cooked it, it was more the sheer size and quantity of said vegetable that put me at a complete loss as to what to do, in fact, I found it quite intimidating having this cucurbita (fancy new word I found) sitting on my worktop glaring at me to use it each time I went in the kitchen.

So I reached out to friends on twitter for some help and the responses ranged from turning it into rum -not helpful, a cake - intriguing but not convincing, or jam - bingo!

So jam it was and after a quick search via Google I came across this simple recipe on the River Cottage website which matched up to the quantities of marrow I had. I wish I could say that I leaped into action there an then, after scribbling a quick shopping list (lemons, preserving sugar and root ginger) but it took another few days before I made it to the supermarket with The Two Monkeys in tow feeling Ã¼ber productive and positive because after a week of having this behemoth of a vegetable glaring at me I was finally going to use it.

On returning home, I got the boys settled The Two Monkeys down to eat their lunch (which I like to think gives me about 15 minutes to do something but in reality its about 5) and returned to the kitchen. Having donned my apron, grabbed my biggest pan and cleared some space I laid out my ingredients to do a "before" shot.

Looks good doesn't it. Very country kitchen. But that was when production came to a screaming halt...and why? Because I had no jam jars. None. Zilch. Because in my infinite wisdom I had the previous evening made tangy plum jam with some of the first fruit off the tree in our garden and used up all the empty jars I had. Talk about school girl error!

So I put my ingredients in the pan which sat on the stove not getting cooked Sunday, Monday, and Tuesday. I was reluctant to buy brand new jars so had scoured some of the charity shops on Monday but to no avail. Wednesday arrived and so did my Mother along with a hoard of empty jars, this is it, I thought...but no, I ran out of time during the day and I was not going to sacrifice watching Great British Bake Off for an overgrown courgette.

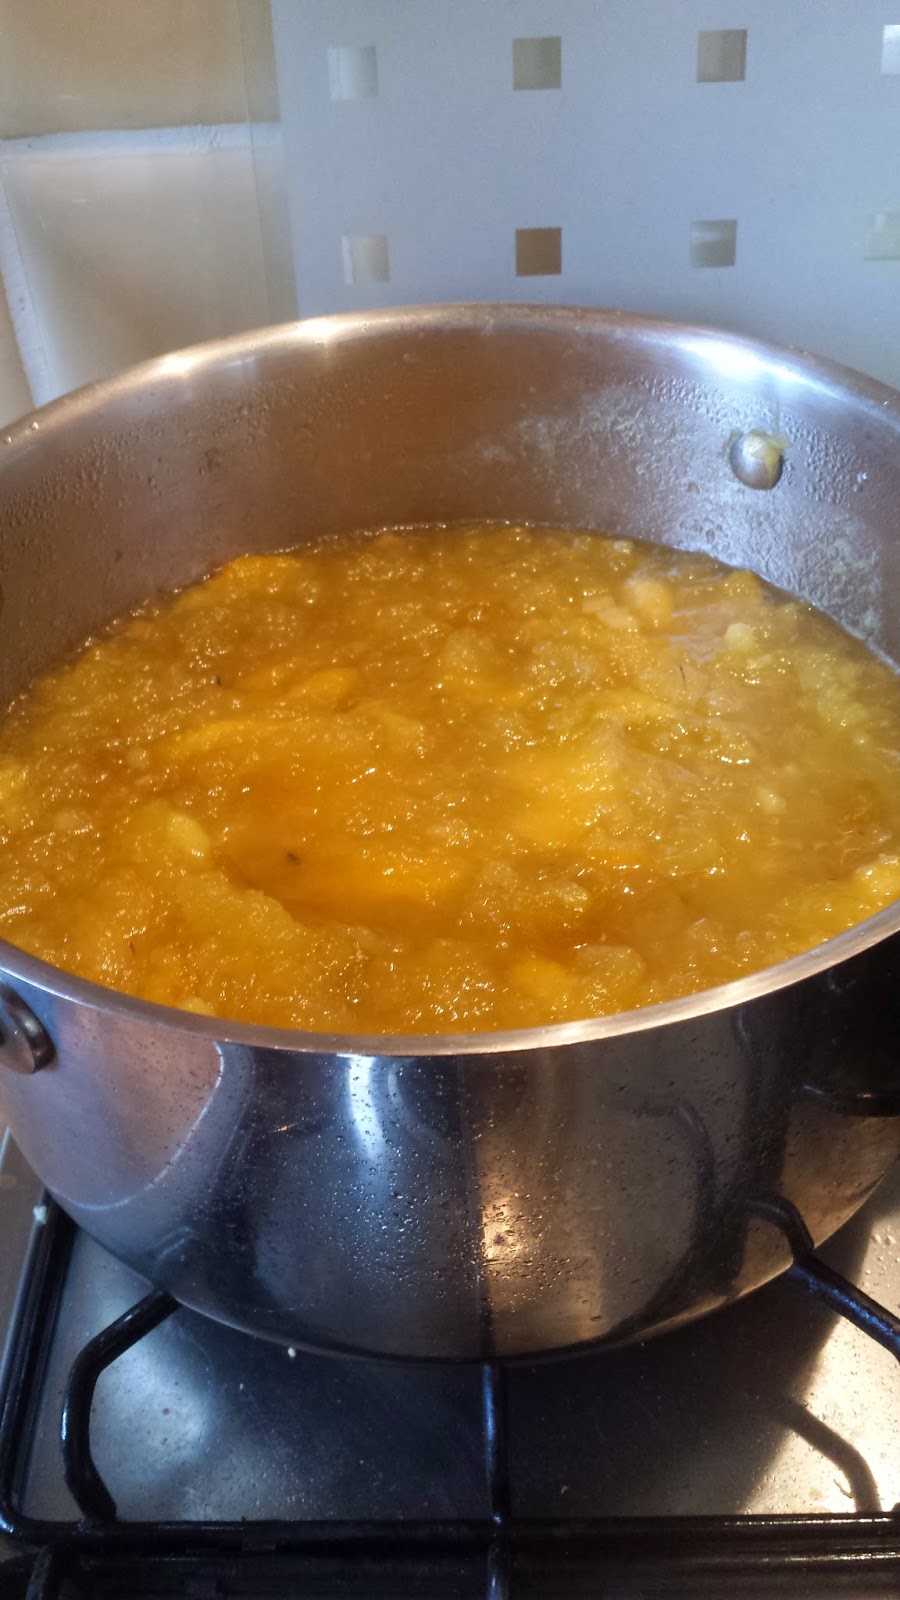
It was Thursday (yesterday) that I finally got to cut into the giant légume. I cut it into slices, scooped out the insides and (leaving the skin on) cooked with a little water but mostly letting it steam in its own juices in the pan.
 Now my thinking behind leaving the skin on was that it would be easier to separate the flesh from the harder skin and on that count at least I was right. The recipe that I referred to above also suggested squeezing the excess water from the marrow which I dutifully did as I removed the skin.

 This however, is where it started to go wrong.

Once I had plonked what remained of the marrow back into the pan it looked rather pitiful, I mean I had expected some reduction but not that much. I added the sugar, lemon zest and juice and the ginger as directed but chose to use fresh ginger over ground or crystallised ginger. I chopped and bruised it to release the oils and then added it to cook with everything else.


But it just didn't look right. Not only did the it just become really pulpy without the natural fluid from the marrow that I had squeezed out, there seemed to be nothing for the sugar to bind with in. It looked lumpy and not at all appetising for spreading on toast or having on a cracker with a really stinky cheese. So either I was meant to end up with more marrow in my pan than the recipe suggested or, and this is my thought, I should have ignored the squeezing instruction.

But what to do now? I am not a chemist and felt, not for the first time with this whole marrow debacle, at a loss.

I did what any normal, sane individual would do.

I added yellow plums.

Now you may be thinking "What?" but my logic went as follows; its similar in colour and these also had a fairly dryish flesh. I had lots of them. As some were still a little under ripe they may add a nice tang to pot which to be quite frank tasted like a zesty ginger stew, the marrow adding bulk but little flavour. And did I mention that I had lots of them?

Yup... please excuse me while I go off topic but I have to tell you about the plums. One of the joys of having a garden is that we now have a plum tree and whilst they are not the sweetest or most flavoursome, I am all about the free fruit and also my Little Giant loves them and will do everything he can to get at the windfalls. So far I had made a crumble, a first pick tangy jam, plum tarts, as well as de-stoning and freezing approximately 4kg and have given various neighbours 500g punnets of them. And there are still more to be picked.

So, back to the jam, why not add them? It couldn't hurt to try right?

Right! After 5 minutes boiling with the plums in the mix I could already see the difference in volume and the consistency looked a lot better too. I continued to cook it at a simmer for another 20 minutes stirring occasionally so the sugar wouldn't catch, but it still did a bit but that's OK because it added a nice bit of colour. I was so pleased to have rescued the jam as I hate waste and I was loath to throw it away.

But now all is said and done I have learnt my lesson, if I am ever offered a marrow in the future I will politely decline and change the subject :)

Friday, 25 July 2014

J is for Joy

Everyone needs joy, that little something in our day that fills us up with a warm fuzzy feeling that reaches all the way to your toes.

Joy can be found in the smiles of your children, watching a loved one win a race, for some people it may be an afternoon in the garden and whilst all those things are perfectly wonderful and true...there is nothing that brings me so much joy as to see my dear husbands face when he realises I have made something sweet to eat, particularly if that something is chocolate based.  What is even better is that the Two Monkeys also want in on some of the cooking action and The Bug loves to put on his apron and become my assistant chef. His words "I have a taste...purrrleeease" melt my heart and I cannot help but indulge him.

Chocolate & Hazelnut Fudge
Now I know that I already covered off how to make fudge in this post, my chocolate fudge is from a slightly different recipe (found here), with dark chocolate and nuts stirred in as the mixure cooled. Today I wanted to share with you a recipe that has given me little bits of joy since I was a child which should be perfect for this overcast July afternoon.

The recipe is called Biscuit Crunch and is taken from the Winnie the Pooh Cookbook as originally printed in 1979.  It is essentially a type of fridge cake which is great for making with little people as there is plenty of opportunity for spoon licking and was always affectionately known in our house as "Pooh Crunch"

Ingredients:
  • 1/2lb rich tea biscuits
  • 4 oz unsalted butter
  • 3 tbsp cocoa powder
  • 2 tbsp caster sugar
  • 1 tbsp golden syrup
  • 4 oz chocolate - plain or milk or a mixture of both (depending on taste)

Instructions
  • Grease a 20cm (8') dish or tin, it can be round or square
  • Measure butter or margarine, cocoa powder, sugar, syrup into large saucepan. Place on low heat and using wooden spoon stir until ingredients have melted. Take pan off heat.
  • Crush biscuits up coarsely in a bowl (this bit is great to do as a little person) and pour over melted ingredients. Use a fork to blend ingredients and coat biscuits. Spoon mixture into cake tin, spread level and press mixture firmly into tin
  • Break chocolate into bowl and melt over saucepan of warm water . Pour melted chocolate over biscuit base and spread evenly. Place in fridge until set
Extras : Should you wish to make your dish a little bit more exciting you can add in dried fruit such as cranberries, or nuts, or chocolate chunks into the mix once you have added the melted ingredients.


Friday, 14 March 2014

'H' is for Hot Pie

OK, so I have kinda skewed the title of this post to make it fit the topic that I want but who can blame me? After all it is British Pie Week and therefore it is most appropriate to write about the British passion for pastry encased yumminess.

I mean, who ever came up with the idea for pies deserves an award for services to humanity and doing the world a huge favour. I mean there are chunky meat pies, then potato topped pies, little tarts and then fruity pies, cobblers and hot crust pies.

It makes my mouth water just thinking of it.

The alternative for 'H' is homemade, which is also (in part) what this post is about. I can honestly say that making a pie from scratch beats a store bought one of the same flavour (and I can say this as I bought one at the weekend) because you stir in that extra ingredient...love. (Smell the cheese of that last sentence there) But seriously, it does taste a whole lot better and you know exactly what goes into it. And most people will shrug off looking at the label but when it comes to feeding The Two Monkeys, it really does matter to me how much salt is in something and what additives it may have.

Having been inspired by the Hairy Bikers cookbook I was given for Christmas 2012 (as mentioned in an earlier post), I made my dear husband pick out a recipe for me to have a bash at for dinner one night.  My only previous pie attempts have been a fruit filled pies or a very lovely and sweet "Pumpkin Pie" from the Hummingbird Bakery cookbook, this would be my first foray into the world of savoury pies and I was a little nervous.

However, I want to make it perfectly clear that making pies really does take baking to a whole new level. It's more than just a mixture in a cupcake case, it is a process that leads to combining filling and pastry and doing your best to avoid a "soggy bottom"
So today I set about creating the "Creamy Chicken, Ham and Leek Pie" that my dear husband had selected, if you're interested in trying it you can find it here. The prep for the filling took me just under an hour, which was good as I could fit it in whilst my Little Giant had an afternoon nap and The Bug played in the room next door.  From there on in it was just a case of making the pie prior to cooking.

Interestingly enough, the shortcrust pastry for this recipe differs from others that I have previously made in that it uses an egg rather than just water.  If anything it created a smoother dough that I could use instantly rather than needing to let it rest.  I also made a point of using cold and cubed butter to make the pastry which I haven't  done in the past and it worked much better.

So we sat down to a very lovely hot pie for dinner tonight and enjoyed every last bite.  There was even some pastry left over for me to make some mini chocolate tortes for pudding.


Friday, 28 February 2014

'F' is for Fudge

And fudged fudge at that...well, my first attempt didn't exactly go to plan and set with the consistency of sorbet.

Still, every cloud has a silver lining and it tasted great and worked even better heated up poured over bananas for pudding. Or, in my dear husband's case, vanilla ice-cream and bananas.

By now some of you may be spotting common theme appearing in my blog...well that is all down to the fact that my dear husband has a taste for all things sweet and chocolatey and who I am to deny this? Instead, I get to be the wonderful wife that can cook and create things to indulge his sweet tooth and mine...because lets be honest here I like sweet stuff too.

So anyway, about two weeks ago I set about the task of making some fudge as a valentines gift for my dear husband. I found a great recipe for vanilla fudge with evaporated milk that was based on timings rather than temperature, which was a good thing as I don't have a sugar thermometer. 

Now I know that traditionally many people would have opted for the condensed milk over the evaporated milk but this wasn't a planned concoction rather I was being sponatneous and using what I had in my cupboard.  Should I ever revisit making fudge I will try it with condensed milk.

At this point a few of you are thinking, hang on, if it was for a valentines gift how can it have been spontaneous? My answer is simply this; I am a stay-at-home-mum on a budget and I didn't have time to knit him anything.

My first attempt was made with granulated sugar which, although part of the recipe, is where I think I went wrong. When I repeated the recipe later on in the week I changed this for caster sugar and got (as you can see) fantabulous results.  I know it tasted good as this box lasted less time than the aforementioned fudged fudge.

*Edit* this fudge does have a more toffee like consistency rather than one that melts in your mouth


Friday, 17 February 2012

'C' is for...

....lots of yummy things such as carrots and courgettes and chocolate and cake or even chocolate cake.

But for today, 'C' is for creativity.

And no, being creative does not mean you have to be good at arts and crafts...I am talking about being creative in the kitchen.

Research carried out a few years ago showed that whilst we have a great interest in food and umpteen cookery shows on telly...the majority of us stick to making nine different dishes with 1 in 4 families cooking the same meal on the same day of the week!

I could not believe it.

But then I sat down and worked out what I had cooked over the past two weeks and realised that they were right! Shock!  Horror!

So I made a vow to try out a new dish each month (I thought each week could be pushing it) and to really do my best to not fall into a routine of cooking the same dishes week in and week out. 

But where to start?

Other research also showed that most families have about seven cookbooks stashed somewhere in their house - most of which are christmas presents. Taking this one step further, if the average cookbook has about 100 recipes (many have more) thats at least 700 different dishes that are just waiting to be tasted.

Yet many of these books sit in a corner or on a shelf and are barely ever opened.

I know I can sometimes be guilty of doing exactly that. I have at least six general recipe books with a further three dedicated to cakes.  Despite this I tend to stick to the same recipes that I have always done but no more...my new method to try and cook new things is to give the book to my dear husband and ask him to pick something for me to cook - the first one he picked was a Grasshopper cake which turned out alright but certainly nothing like the picture!

I have actually just been giving a belated birthday present of  the Hairy Bikers book "Perfect Pies" as my family know that I enjoy making pastry yet it is something I am still fairly new too and it has really given me the courage to try some very new things.

And this leads me on to one final point...cookbooks have three 'i's, two of which are great and one which must be ignored
  • information - I love my Mary Berry's Complete Cookbook as it has step by step photo-guides on how to prepare different cuts of meat which I find REALLY helpful when trying new things
  • inspiration - whilst recipes are great they may not result in a dish that is perfectly to your liking...so add your own twist and make it yours.
  • intimidation - the pictures of the immaculately presented finished dish can be very daunting, especially if you are using a new cut of meat or fish. Best thing is to use them as a guideline but don't panic if your dish is not an exact match....it's more important that it tastes good!
EDIT: Two years on from originally writing this in 2012, and I have to confess that I am very guilty of doing this. And I have had at least 3 more cookbooks given to me since this was posted (all Christmas gifts) and I think I have maybe used one recipe from each of them. Admittedly when I do find the time to trial a new recipe it may make it into my repertoire for a few weeks before being replaced by something else as I don't want to make it or have gotten bored with eating it. That said, I am trying to introduce a wider range of foods into our diet and therefore that is forcing me to try out new recipes. I have also decided to edit and repost my original posts D to J and put them into the context of my life as it now stands.